
Types of Tile Spacers
time2023/09/18

- A tile spacer is a small tool, usually made of plastic, used to ensure even separation of tiles. Here are some tile spacer types that may be sufficient for your construction needs.
In traditional architecture and design, ceramic tiles are reserved for wet areas such as bathrooms and kitchens. However, with design trends changing every year, more and more homeowners are now choosing to use tiles on floors and walls outside of wet areas. In addition to their practical uses, ceramic tiles offer unique visual appeal compared to other floor and wall designs. This is because there are now many tile options available, including materials such as glass, ceramic, porcelain, and natural stone.
For this reason, most construction, remodeling, and renovation projects you will tackle will include ceramic tiles. Therefore, it is essential to get the right tools and skills to guarantee a great tile job. Contractors focus on getting the best tile leveling system to achieve the best finish during the tile laying process.
However, the laying of tiles is also crucial to ensuring the best final look for tiled walls and floors. One of the tools you will need for this is a tile spacer. This is a small tool, usually made of plastic, used to ensure even separation of tiles. Used correctly, your tiles can look even and clean.
It is used to create equal distances between tiles, thus producing a uniform tile layout for your desired pattern. Although they are not a hard requirement for installing tiles, using tile spacers is more efficient and practical than simply looking at the tiles and estimating whether the distance between each tile is equal.
However, your local hardware or building supply store sells many types of tile spacers, some of which may have different uses and purposes. Here are some tile spacer types that may be sufficient for your construction needs.
X-Shaped Gasket
These shims are commonly used shims that, as the name suggests, resemble a cross. Spacers are used at the intersection of four tiles, such as the main body of a wall or floor installation. X-shims are available in sizes from 1/16 inch to ½ inch.
Tavy Tile Spacers
This is a variation of the X-shaped spacer. Instead of being a simple cross, Tavy tile spacers have a ring around them. This ring prevents the spacer from falling into the adhesive used to adhere the tile to the substrate.
It also allows you to visualize the four corners of tile intersections. Tavy tile spacers are available in sizes from 3/8 inch to 1/32 inch.
T-Shaped Tile Spacer
These are usually used at the intersection of three tiles. Therefore, T-shaped tile spacers are often used where in-situ tiles intersect with trim, or when piecing together a continuous bonded tile pattern. Spacers are available in sizes 3/8'' to 1/32''.
Tile leveling Wedges
These are small-size spacers, usually made of flexible plastic. They are commonly used for wall tile installation and height adjustment of uneven handmade tiles. If desired, wedge spacers can be stacked on top of each other to create wide spaces between tiles.
U Spacer
These are sometimes called U-shaped spacers. They are often used to install countertop tiles on top of plywood before installing the backing board. Horseshoe shims are available in 1/8-inch, 1/16-inch, and 1/4-inch sizes.
Once you have determined the size of your tiles, you should measure the spacing between them to minimize the need to adjust the size once you begin installation. This way, you can lay the tiles without using too much filler or nuggets that interfere with the edges and layout of the tiles.
Therefore, without the spacers mentioned above, you cannot guarantee an optimal and cheap tile installation. The correct size of the tile spacers is also important. For example, tiles that measure 8-by-8 inches typically require 1/16-inch or 1/32-inch spacers, while 12-by-12-inch tiles require 1/8-inch or 1/16-inch spacers.
Laying Floor Tiles
While the process of applying tiles is very simple, the time required to apply the tiles (and make sure they are level and aligned correctly) can take a little longer. So, here's how you should apply tiles correctly.
Clean Existing Floors
Make sure the floor is free of any glue, dirt, and mortar that could affect the smoothness, adhesion, and stability of the tiles. If the floor is a new cement layer, give the subfloor at least 24 hours to completely dry and stabilize. Use a broom first, then mop with an all-purpose cleaner.
Build Your Starting Point
If you start in the center of the room and your tiles are not custom-made for the job, you will most likely need to cut some of the tiles to fit around the edges of the floor.
This way, large furniture can cover the cut tiles. Otherwise, start in the center of the room.
Organize Your Tiles and Create Guides
If all your tiles are the same and don't have a specific location, this shouldn't be a problem. However, if you are using tiles that need to be placed in a certain location, alternate tiles, or create a specific pattern or design, organize the tiles accordingly so you don't have to move them back and forth each time you install a new tile.
Now is also a good time to measure the room and find the center. Mark it with chalk or any other method that works for you. This will be helpful when later attaching the tiles in the center of the room to the wall.
Use Mortar or Tile Cement
Ideally, you should use tile cement for linoleum or vinyl tiles and mortar (thin) for ceramic or porcelain tiles. Using the flat side of the trowel, spread enough mortar or cement on the floor and comb it out to create even, horizontal lines. Your tiles will be anchored to the floor more effectively by using neat horizontal lines than by adding random curves or adding no lines at all.
When applying mortar, apply only enough to hold the tiles for 10 minutes. If you add more, the mortar may begin to harden too quickly and will need to be scraped off and reapplied. If you are using tile cement, wait 10 to 15 minutes for it to thicken before applying.
Press the tile firmly into the tile cement or mortar. Use a rubber mallet or claw hammer to press down on the tile so it sticks to the floor better. Insert a tile spacer into the corner of the tile and use it to measure equal distances between tiles. Wipe away cement spills between tiles.
Some tile spacers must be removed after all four tiles have been laid, while others can be removed after the tiles have dried overnight.
Tips for Installing Tiles
- Keep the room as empty as possible while installing tiles for maximum efficiency.
- After installing the tiles, keep the room well-ventilated to help them dry faster. It is best to keep doors and windows open for better air circulation.
- Bring enough tile spacers so you don't have to remove and reuse the spacers before the tiles are dry. Your tile spacers can be cleaned and reused for your next project.
- When installing tiles on counters and walls, the same steps apply, but make sure the tiles are firmly in place before releasing.
- If possible, allow tiles to dry for at least 24 hours.
- Once the tiles are dry, apply a layer of grout and work it into the gaps in the tiles.
While tile spacers are not a requirement for tile projects, they are a small but highly recommended tool that can help avoid construction accidents and misaligned tiles. This can result in a distorted tile design or a poor-quality job that your client won't appreciate.
The above introduces different types of tile spacers and tips for installing tiles. If you want to know more or want to purchase tile spacers, please contact us.
TILER is a professional custom tile-laying tools manufacturer. We are committed to providing installers with accurate, efficient, innovative, and professional tile cutting and laying tools. Our six product categories cover all the necessary tools for tile decoration, including tile leveling tools, tile cutters, large slab systems, tile treatment tools, grouting and cleaning tools, and other tile tools.

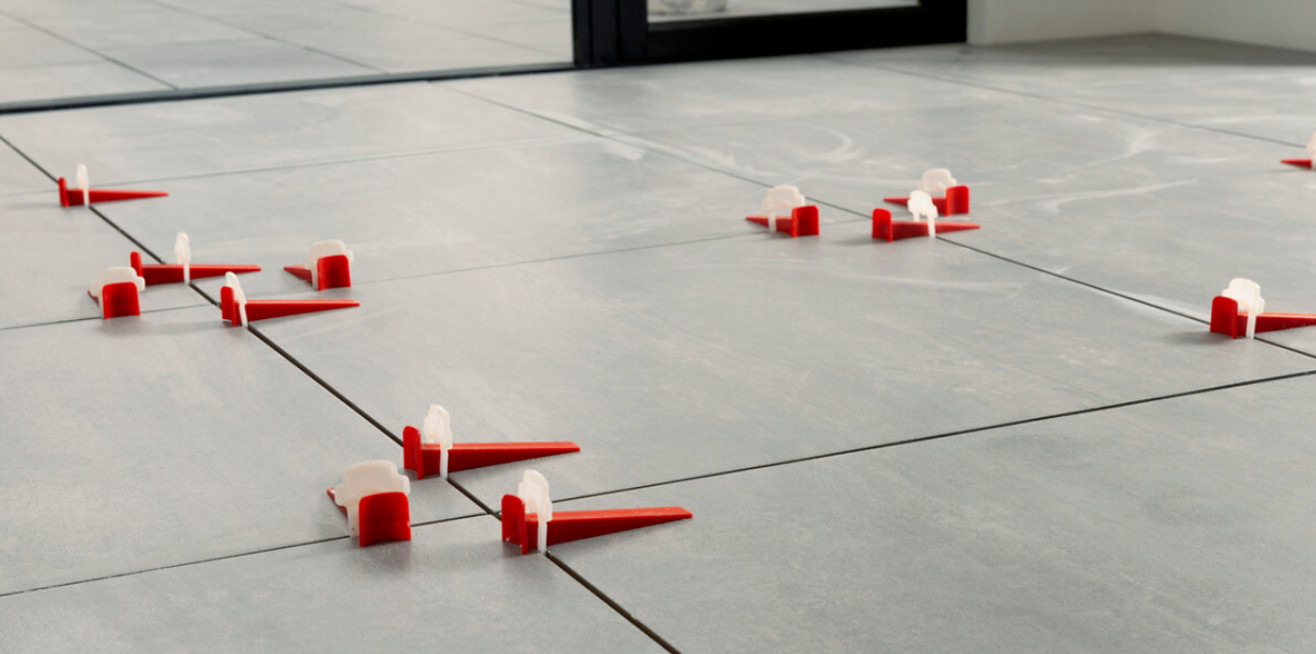
Tile spacers are placed between each tile during installation to create a uniform gap or joint between the tiles.

Tile spacers are placed between each tile during installation to create a uniform gap or joint between the tiles.

Tile spacers are placed between each tile during installation to create a uniform gap or joint between the tiles.

Tile spacers are placed between each tile during installation to create a uniform gap or joint between the tiles.