
An Expert Guide on How to Use a Manual Tile Cutter
time2023/07/10
- As with all tools, manual tile cutters are best suited for specific applications and materials. Read on to learn how to choose the right model for your project and how to use a manual tile cutter.
Do you want to start a DIY tile project? A manual tile cutter is one of the most valuable tools you can use. This relatively simple tool is affordable and requires no electricity or water, minimizing your utility bills. It enables you to make clean, straight, and precise cuts in tile. As with all tools, manual tile cutters are best suited for specific applications and materials. Learn how to choose the right model for your project and follow these step-by-step instructions to use a manual tile cutter like a pro.
Purpose and Application
Manual tile cutters are designed for cutting glazed and unglazed tiles and ceramic tiles. It's the must-have masonry equipment that any DIYer should have, along with a trowel, masonry hammer, chisel, and concrete mixer. However, you should not use a manual tile cutter on stone tiles such as marble, limestone, or granite. It is also not suitable for concrete and cement tiles.
Stone and cement are harder materials than ceramic or porcelain and require more cutting power than a manual tile cutter. If you try to cut tile made from these materials with a manual tile cutter, you run the risk of premature wear or cracking and damaging the tile. Wet tile saws are better for tiles made of hard materials.
Parts for Manual Tile Cutters
The nine basic components of a manual tile cutter include:
- Base (most use two, but some models may have a single rail)
- Guide rail
- Carriage
- Handle
- Scoring wheel (also known as cutting wheel or blade)
- Breaker (some manufacturers may refer to these as disconnects, toggles, snap feet, or breakers)
- Ruler (also known as measuring sticks)
- Lateral stop
- Backstop
How To Use A Manual Tile Cutter Step-By-Step?
Manual tile cutters allow you to cut individual tiles piece by piece using a technique called "scribing and breaking." The principle of this technology can be divided into two stages:
- Scoring: using a scoring, grinding, or cutting tool to carve grooves or trenches into the work surface, creating a weak point in the tile which is then exploited in a second stage.
- Breaking: involves applying measured pressure (stress) to the work surface on both sides of the score, bending the tile until it breaks. Cracks form at the weakest point of the stressed surface, causing the tile to snap off along the length of the score, creating a clean, straight cut.
Manual tile cutters can only cut single straight lines, not curved lines, or mixed cuts. Most only allow you to cut at two angles: straight (90°) or diagonal (45°). Some models have an additional part called a swivel angle that allows you to adjust the cutting angle anywhere between 0° and 45°. However, these dedicated manual tile cutters are more advanced and require experience with the standard models.
Make a Straight Cut
- Mark the tiles with a pencil to provide yourself with visual guiding lines.
- Insert the tile into the base of the tile cutter, resting one side against the stop.
- Use the handle to position the bracket over the tile until the scribing wheel is above the edge of the tile where you will begin scribing.
- Apply even pressure on the handle and push forward to slide the carriage towards the backstop. This action will cause the scoring wheel to mark the tile and you will hear the tile scraping or cutting. If you did it correctly, the score should be exactly right.
- Pull the handle up until the breaker (flat elbow) rotates and faces the tile.
- Pull the carriage back (away from the backstop) about an inch.
- Push the handle down and use the breaker to apply pressure to the tile until you hear a click.
If you followed the steps above correctly, your tile should now be cleanly cut in half. Remove the cut tiles from the base and move on to the next until all the tiles have been cut or reshaped.
Make a Diagonal Cut
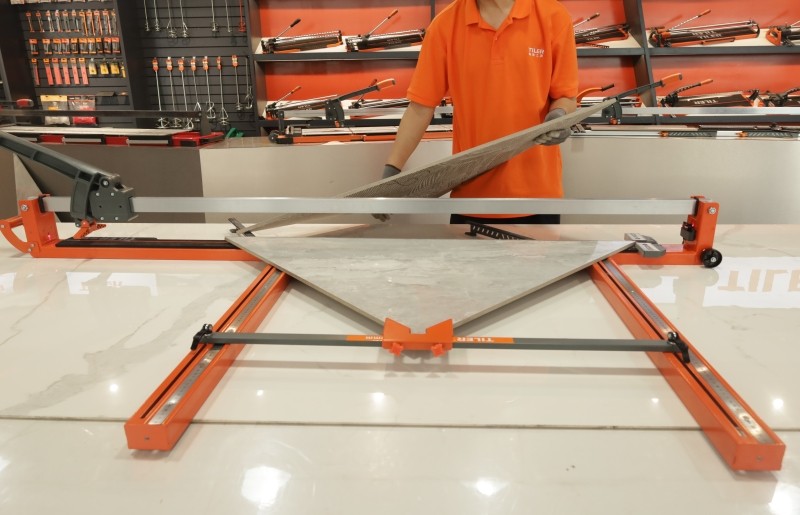
Cutting tile diagonally requires following the same overall process, with one notable difference: the orientation of the tile on the base. Instead of resting one side of the tile against the backsplash, you need to line up the two opposing corners with the center of the base, inserting one corner into the diagonally shaped guide in the center of the backsplash. This guide will help keep the tiles in place and oriented at the correct angle. Once the tile is in place, proceed with the scoring and snapping process as you would for a straight cut.
Smooth Rough Edges
Even if you cut the tile cleanly, you may find that the edges of the cut tile pieces are a bit rough or sharp to the touch. While this is a normal part of the cutting process, you may want to smooth the edges to make them less dangerous to touch and more aesthetically pleasing.
Two simple tools can help you complete your manual tile-cutting kit: sandpaper (one medium, 80 or 100 grit, one fine, 200 or 220 grit) and a tile file.
- Sanding: With goggles on, begin using medium-grit sandpaper, rubbing the surface against rough tile edges until the sharpest edges are smoothed. Then, switch to fine-grit sandpaper and sand the edges further until they are no longer rough to the touch.
- Filing: Using tile files is even easier; simply place the tile on a flat surface with the uncut edge facing the ceiling. Hold the tile with your non-dominant hand, then hold the tile file with your dominant hand and rub the rough-edged surface until it is smooth.
Keep in mind that both sandpaper and tile files wear out with use, especially if you need to smooth a lot of tiles or do frequent tile projects. Keep spare sandpaper and tile files next to your manual tile cutter in case they become dull.
Tips and Tricks for Beginners
Always wear proper personal protective equipment (PPE) before operating a manual tile cutter. Three must-have pieces of protective gear for all tile workers are gloves, goggles, and knee pads:
- Gloves: When using any type of tile-cutting tool, even non-electric tools such as manual tile cutters, your hands are exposed to the sharp blades and cutting equipment. Use work gloves made of cut-resistant materials, such as high-gauge polyester-blend gloves for hand protection and latex palms for added dexterity.
- Eye Protection: While the risk of ceramic shrapnel projectiles is much lower when cutting tiles by hand than with a saw, this can still happen with tiles that are not cut perfectly. Protect your eyes with a pair of clear, impact-resistant safety goggles.
- Knee Pads: Most tilers use manual tile cutters on the floor, which means you'll be kneeling a lot. Protecting your knees with a pair of lay-on knee braces can prevent not only acute knee pain but long-term health problems such as prepatellar bursitis (also known as carpet knee).
If you've never used a manual tile cutter before, don't start your flooring project right away. Good practice is essential before you start cutting tiles for your new floor. The best way to train yourself to use a manual tile cutter is to use cheap or discarded tiles for practice cutting.
There are two skills to practice: aligning the tiles correctly, and mastering the consistent motion needed to cut the tiles in a straight, even manner. Buy lots of cheap practice blocks until you learn the correct form and proper pressure. Imprecise scoring or applying too much pressure to the tile during scoring or snapping can often damage the tile, requiring you to throw away the broken pieces and start over with a new tile.
The steps and methods of using the manual tile cutter have been introduced in detail above, if you want to know more about tile cutters or you want to buy tile cutters, please contact us.
TILER is a professional custom tile-laying tools manufacturer. We are committed to providing installers with precise, efficient, innovative and professional tile cutting and laying tools. Our six product categories cover all the necessary tools in the world of tile decoration, including tile cutters, large slab systems, tile handling tools, tile leveling tools, grouting and cleaning tools, and other tile tools.

Manual Tile Cutter 8100X is the perfect choice for professional installers who demand precision, durability, and ease of use.

Manual Tile Cutter T3 Super-Pro is the perfect choice for professional installers who demand precision, durability,ease of use.

Manual Tile Cutter T2 Pro is the perfect choice for professional installers who demand precision, durability, and ease of use.

Manual Tile Cutter Y2 is the perfect choice for professional installers who demand precision, durability, and ease of use.