
How to Cut Tiles ?
time2023/05/25
- Did you know that you have more than one option when it comes to cutting tiles to install? So how to use a tile cutter to cut tiles to a certain size? Read on to learn more.
Did you know that you have more than one option when it comes to cutting tiles to install? You can use hand or power tools. While both tools will get the job done, your success with either tool depends on how well you know how to use a tile cutter. So, the best practice guide is a must. Here's what you need to know before cutting your first tile.
How To Cut Tiles By Manual Tile Cutters: The Preferred Method For Small Jobs
If you're just doing a small job, the best way to cut tile to size is with hand tools.
Manual tile cutters are great for sizing tiles and tiles and are the best equipment for one-off jobs like replacing damaged tiles.
In short, a hand cutter will give you the straight edges you need for small tile projects.
Before Cutting the Tile, You Will Need:
- Tiles of your choice
- Pencil for creating marks
- Manual tile cutter
- Tile pliers for cutting smaller pieces from tiles
- Tile scribe for straight cuts on porcelain and ceramic tiles
- Tile file or whetstone to smooth the edges
- Safety glasses and a dust mask to keep the excess tile from getting in your eyes and lungs
- Wear protective gloves when using any machine
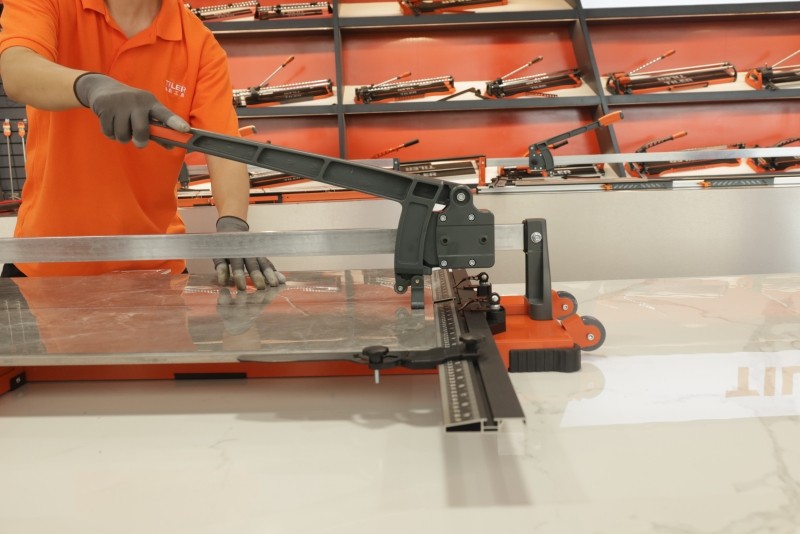
How Does a Manual Tile Cutter Work?
A manual tile cutter is a simple and effective tile-cutting tool. A tile cutter works by applying pressure to the tile with the handle, which then guides the blade along the line of the tile to cut. This allows you to easily snap off any excess tiles.
Step 1 - Measure and Mark: Measure the width and length of the space you will need the tile to be inserted into. Alternatively, place the tile on top of the last tile cut to align the dimensions. Then start making pencil marks on the tiles to be cut.
Step 2 - Line the Tile: After scribing, use the handle to gently press on the tile. This will allow you to cut enough of the surface to weaken it along the lines you marked. Be careful not to apply too much pressure to the blade as this may cause the blade to break and you will hear a faint scratching sound indicating that the tile has been scratched.
Step 3 - Breaking Tile: Hold the tile firmly on the cutting wheel and lower it slowly until it touches the wheel. Then, move the knife back and forth, applying downward pressure on your scoring marker until you break through (this should be easy to do).
Step 4 - Cut Small Pieces: If you are working with smaller or curved pieces, you will need to use tile cutters to cut small pieces to the desired size or shape.
Step 5 - Sand the Edges: If cutting leaves rough or jagged edges, simply use a whetstone or file to sand the edges.
Cutting Tiles with an Electric Tile Cutter: An Efficient Solution for Large Projects
When you want to cut a lot of tiles or plan on dealing with curved edges and complex shapes, a wet saw/electric tile cutter is the perfect device for the job.
These tools are designed for cutting thicker tiles and other hard materials such as marble, granite, and natural stone tiles. A wet saw is also great for creating custom shapes out of tile without having to cut all the pieces individually.
Safety procedures must be understood before beginning. Before using a moving saw to cut straight lines, make sure you get used to the pressure and movement of the moving saw.
How Does a Wet Saw Work?
A wet saw is a chainsaw that has a water reservoir and a pump to keep the diamond blade cool. It makes cutting tiles easier because it reduces friction between the blade and the tile. The result is fewer cracks and breakages in the finished product.
For large rooms or rooms with complex floor plans, a wet saw is recommended.
Step 1 - Start Setup: Place your electric tile cutter on a level, sturdy surface, preferably in a garage or outside. Make sure there is enough space around the saw for you to move safely and comfortably. Once properly positioned, open the tank and fill it with the recommended amount of water stated in the instruction manual.
Step 2 - Mark with a Pencil: As with a hand cutter, you will still need to create marks on the tile where you intend to cut. Adjust the fence to make sure the marked tile meets the blade.
Step 3 - Preparing the Tile: Plug in the machine and turn it on. Once the water begins to circulate, be patient and wait for the water to completely cover the blade before cutting. Place your material or project on the cutting table, making sure it is clamped securely in place with an adjustable clamping system or vise.
Step 4 - Start Cutting: When using a wet saw, it is important to move at a consistent speed. If you move too fast, you'll find that the blade will start chipping away at the material and causing it to splinter. However, if you move too slowly, you won't be able to cut through the material in time. Gently rearrange the tiles to carve the desired shape.
Save Time with Tile Cutters From TILER
TILER is a professional tile-laying tools manufacturer. Since the invention of our first tile cutter, we have been committed to providing installers with quality, efficient tile cutting, and laying tools. With over 28 years of experience, patented technology, and unparalleled production capabilities, TILER has become an industry leader, serving customers in more than 130 countries. We advocate the spirit of craftsmanship and are committed to making perfect, precise, and safe products. Through advanced design, high-quality products, and customer service, TILER makes laying easy and provides an enjoyable experience for installers. If you want to buy tile-laying tools, welcome to contact us.